Monday, April 29, 2013

How to make friends and impress people


I went a pot-luck on Saturday night and was asked to bring bread. So I made some foccacia in the breadmaker. It never ceases to amaze me how impressed people are when you make homemade bread. I think they have this vision of me spending hours in a hot sweaty kitchen, energetically kneading huge mounds of dough. The thing is, when you have a breadmaker, it is incredibly easy to make bread. In fact, to be honest, I was out for a while on Saturday and had my 12 year old son make one of the loaves for me. Yes, the kitchen was coated in a fine film of flour, and some of the ingredients have inexplicably disappeared, having been 'put away' in the wrong place. But the loaf was beautiful. The recipe and the breadmaker are, quite simply, foolproof (in case my sensitive son is reading this, please don't read anything into the use of the word 'fool' darling, it's a turn of phrase!) If you have a breadmaker sitting idle, and fancy trying the focaccia recipe, then look at the blog entry for 3/25/13. You will, quite simply, make friends and impress people. And if you want to seal the deal, feel free to string them along with tales of endless, flour-covered, bicep-stimulating, kneading sessions in a sweaty kitchen.

Today, I decided to try something new in the breadmaker, and have been reliably informed by my daughter (quite a bread aficionado herself) that it is "very yummy", and this from a sullen pre-teen whose most effusive praise is often something like a mumbled "it's OK, I guess..." I take that as praise indeed, and certainly an indication that the recipe is worthy of an entry here. The basis for the recipe came from a Better Homes and Gardens publication called "Best Bread Machine Recipes", but I tweaked it using a different cheese and using the 'Dough-Only' cycle on the machine, so that I could take it out and shape it myself, making it much more like the Asiago Bread we often buy at the store (which is apparently yummy too, but often disappears before I get to taste it!).

So get your breadmaker out and set it to work.

Asiago Bread
(makes a 1.5lb loaf)

3/4 cup 2% milk
3 TBSP water
1 egg
1 TBSP butter, (soft, not straight out of the fridge)
3 cups bread flour
3/4 cup finely shredded Asiago cheese
1/2 tsp salt
1 rounded tsp active dry yeast

For topping:
olive oil
1/2 cup finely shredded Asiago cheese

1. Add ingredients to bread machine in order shown. (If you are setting the breadmaker to delay its start, make sure the yeast sits on top of the flour, without touching the other ingredients).
2. Set breadmaker to go on 'Dough-Only' cycle.
3. When breadmaker finishes, take dough out of machine and shape into a rectangle (about 1" thick) on a baking sheet sprayed lightly with olive oil spray.
4. Brush the top of the dough with olive oil and sprinkle with shredded Asiago.
5. Leave the dough in a warm-ish place to rise (mine rises beautifully just set on the kitchen counter, or on a winter's day, sitting on top of the dryer in the laundry room) for about 45 minutes. By then it should have doubled in size.
6. Bake at 400 degrees F for 12-15 minutes until golden brown.
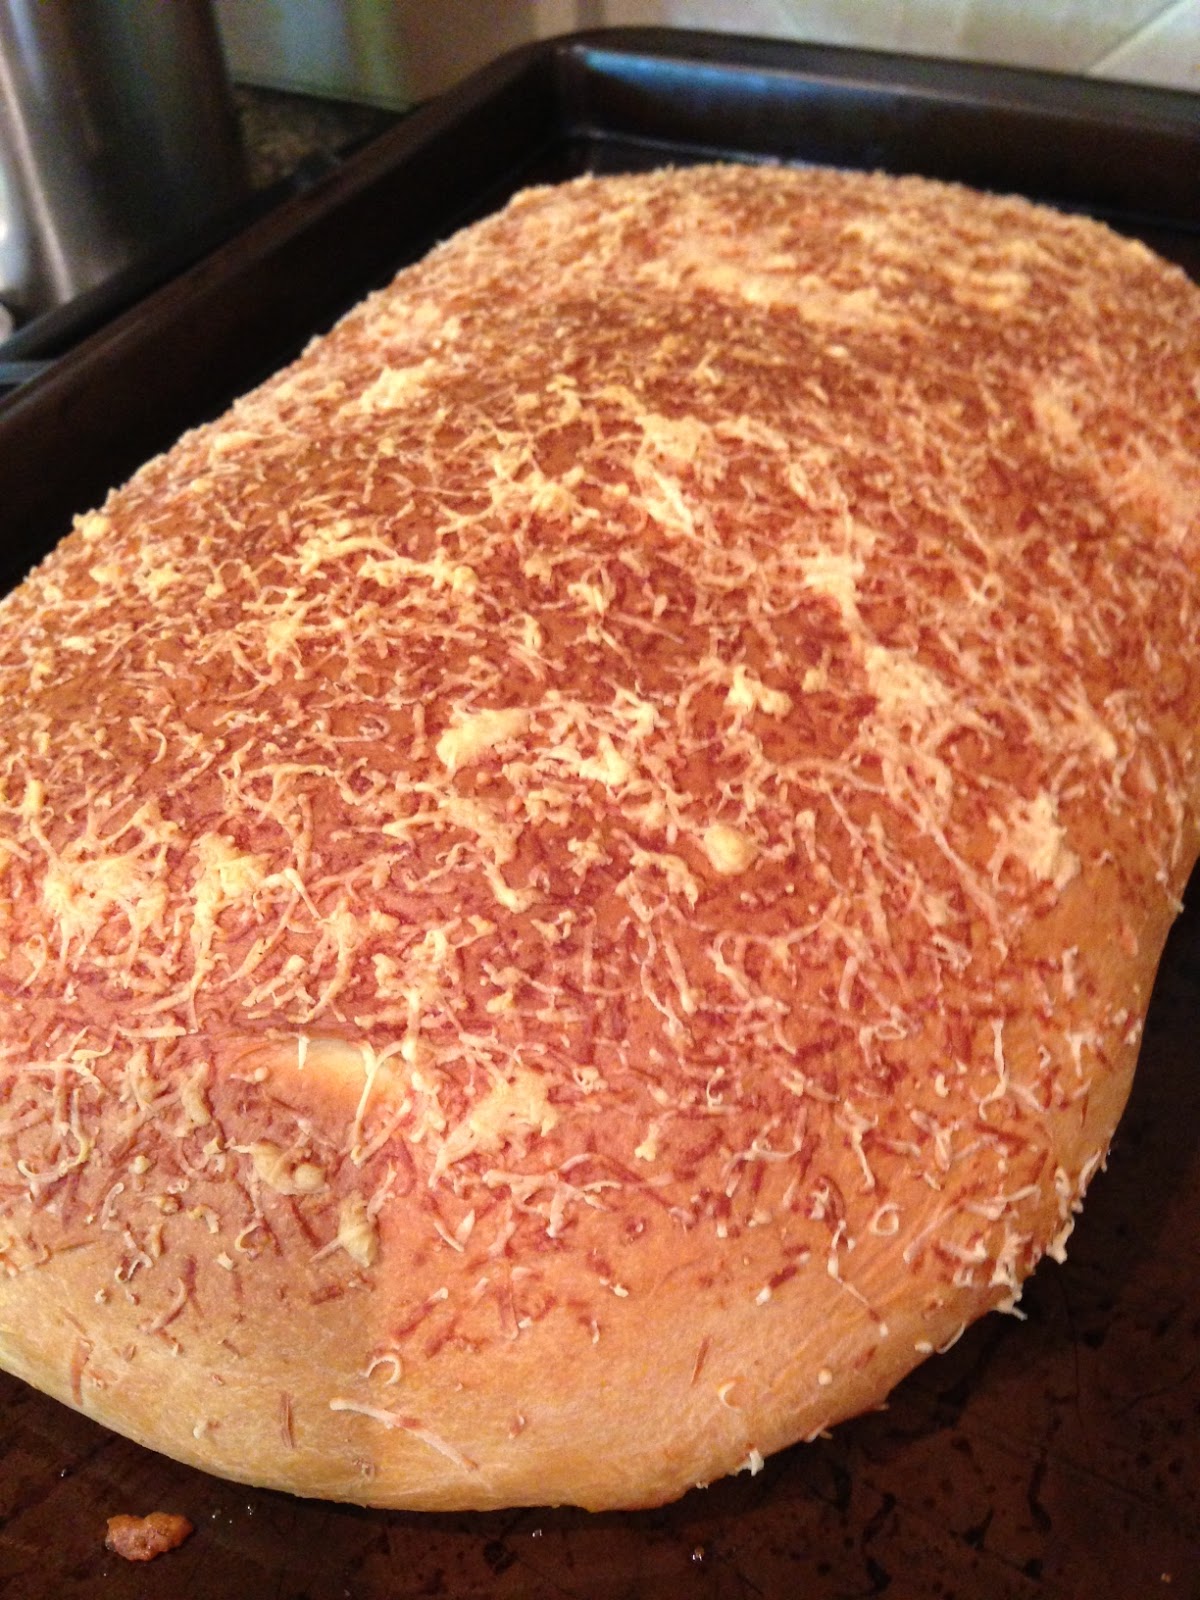

Best eaten fresh and still warm :-)
 
Any left-overs (yeah,right) make a great crunchy topping for your next mac and cheese, pasta bake etc. Just whizz the remaining bread up in the food processor and sprinkle breadcrumbs over the top.

Sunday, April 28, 2013

Tweaked and Twisted makes the cut

I have had a recipe for Lentil Moussaka in my recipe file for years. It's on a crumpled post-it (except the non-sticky kind, which makes me think, I've had it for a really long time!). The ink is all smudged, and there is no source listed. Whoever you are, sorry I cannot credit you. However, since the recipe has never worked right, I expect you should be glad that I can't. I have tried it several times (ever the optimist) and never has it really come out well. It's been dry, not cheesy enough, too much aubergine/eggplant, you name it. But, call me stubborn, this week I decided to have another go and made a few tweaks and twists.

I have to say, I think this one now makes the cut for a blog entry. It was juicy, with enough aubergine/eggplant to merit being called a moussaka, but without it being overpowering, and enough creamy topping to keep it all moist and cheesy.

I would love to tell you that all three kids ate it, but no. One out of three isn't bad though, and let's be honest, if I was to follow all their advice, I would be wearing neon, worshiping Taylor Swift and laughing at sitcoms on the Disney Channel as if they were actually funny. As much as I like my kids to eat, I cannot cater to their preferences every night. My policy as always been "hey, there is bread on the table, you won't starve".


Lentil Moussaka
Serves 6

6 oz red lentils
1 28oz can diced tomatoes and 1 14.5 oz can diced tomatoes
2 cloves garlic, crushed
1 tsp dried oregano
1/2 tsp ground nutmeg
1 vegetable stock cube
225ml boiling water
olive oil
1 large aubergine/eggplant sliced into 1/2" slices and then each slice halved
1 large red onion, finely chopped
4 eggs
20 oz light cream cheese (Neufchatel)
1/2 tsp nutmeg
1/2 tsp onion powder

1. Preheat oven to 400 degrees F.
2. Put lentils, tinned tomatoes, garlic, oregano and nutmeg into a saucepan. Dissolve stock cube in boiling water and add that to pan. Bring to boil, and then simmer for 20 minutes, by which point, lentils should be cooked.
3. Meanwhile, heat some olive oil in a large skillet and saute the aubergine/eggplant with the onion until lightly browned and softened.
4. Spray a 9" square ovenproof dish with olive oil spray. Pour in half of the lentil mixture. Top with a layer of the aubergine/eggplant slices and onion. Then pour over the rest of the lentil mixture.
5. Beat eggs with softened cream cheese, onion powder and nutmeg. Spread this mixture over the top of the lentils in the ovenproof dish, spreading it out to the edges of the dish.
6. This can bubble over in the oven, so put a baking sheet under the shelf you plan to place the dish on to before putting the dish in the oven.
7. Bake the moussaka in the oven for 25-35 minutes until the top is set and lightly browned.

Thursday, April 25, 2013

Where's the beef?

Right here, in all its glory :-)
 
Some people reading this blog might assume that I am a vegetarian, apart from the odd foray into the poultry aisle. This is not the case, although my family do try and eat vegetarian meals at least 2 or 3 times per week. This is partly for health reasons, and partly because I like vegetarian food (and the other four Farrars seem content to let me control the menu... most of the time. They are certainly content to let me cook it all!). We eat red meat at most once per week for dinner, and I would not want to give that up - there is nothing like a good beef stew, and again, this is where my love affair with my slow cooker and Judith Finlayson can shine!

This recipe is taken from Judith Finlayson's 'The Healthy Slow Cooker', and although it contains more fat than some of her recipes, this can be minimized by using very lean beef. According to my beloved Judith, the dish is also apparently an "excellent source" of vitamins C, B12 and K and potassium, iron and zinc. Can't argue with that! The only tweak I made was to use ground cumin, instead of cumin seeds. I'm sorry, Judith, but life is too short to be toasting cumin seeds and then grinding them up in a mortar. I served the beef on a bed of cous cous with a side of roasted cauliflower (recipe follows below). It was delicious, and the very meagre leftovers are being enjoyed by my husband today, courtesy of the microwave at work. He may be still hungry afterwards, but his taste-buds will be happy!

Mediterranean Beef Ragout
serves 5-6

1/4 cup AP flour
1 tso dried thyme leaves, crumbled
1 tsp grated lemon zest
1/2 tsp salt
1/2 tsp ground black pepper
2 lbs trimmed stewing beef, cut into 1" cubes
2 TBSP olive oil, divided
2 onions, chopped
4 cloves garlic, minced
1 tsp ground cumin
1 cup beef stock
1/2 cup dry red wine
1 14.5 oz can diced tomatoes
2 bay leaves
2 roasted red bell peppers, thinly sliced and then cut into 1" pieces (I used one jar of Safeway's fire-roasted peppers)
1/2 cup sliced pitted green olives (I used pimento stuffed Spanish Queen olives from a jar, quartered)
1/2 cup chopped fresh parsley

1. In a large ziploc bag, combine flour, thyme, lemon zest, salt and pepper. Add beef and shake until evenly coated. Set aside, shaking any excess flour from beef and reserving.
2. Heat 1 TBSP of oil in a large skillet over medium-high heat and brown beef in batches. Transfer to slow cooker.
3. Reduce heat to medium. Add onions and garlic and cook until onions are softened (about 3 minutes). Sprinkle in cumin and remaining flour mixture and cook, stirring, for a further minute. Add stock, wine, tomatoes (with their juice) and bay leaves, and bring to the boil. Cook stirring until slightly thickened (about 2 mins). Add to slow cooker and stir well.
4. Cover and cook on Low for 8 hours or High for 4 hours until mixture is bubbly and beef is tender. Stir in roasted peppers, olives and parsley. Cover and cook on High for 15 minutes until peppers and olives are heated through.


Roasted Garlic Cauliflower
serves 5 good appetites

2 small/medium heads of cauliflower (I used one green, one white), divided into florets
2 TBSP olive oil
1 TBSP minced garlic (about 4 large cloves)
salt and pepper
1/3 cup grated parmesan
1/4 cup chopped fresh parsley

1. Preheat oven to 450 degrees F.
2. Toss first 4 ingredients together in a 9x13 baking pan, and bake for 25 minutes.
3. Sprinkle on the parmesan cheese and the parsley and either bake for a further 5 minutes, or broil until cheese is golden.
\

Tuesday, April 23, 2013

Oh-so-very-spring chicken

You remember last week when, in a fit of pique at evidence of my advancing age (and consequent lack of coordination), I posted several recipes involving ancient grains? Well, this is the antidote to that. I saw this recipe in my favorite British food magazine Good Food, and how could I turn down something called 'Spring Chicken'?

Not that I am getting any younger this week, and I did trip over the doggy stair gate this morning, so my coordination is still not what it was. But, since you are apparently only as young as you feel, I am opting to change my mindset, at least through the recipes I choose. Clearly I express my emotions through the food I put on the table. Not to worry, unless I start posting up anything involving blood oranges...

Posting a recipe called Spring Chicken also gives me the opportunity to post a link to one of the classic Swedish Chef skits. I wish I had his panache in the kitchen ;-)
Swedish Chef Spring Chicken Skit

Anyway, this dish (involving a more conventional chicken, that was not still springing when it made it into my kitchen) went down a treat. As you will no doubt have noticed, I do like one-pot meals, but often they are a little wintery and more suited to a cold dark evening, rather than a warm sunny spring dinnertime, when there is still abundant daylight outside. This dish is an exception, as it really does taste light and appropriate to a warmer season.

The recipe is taken from Good Food Magazine (available internationally as an app on your iPad from iTunes) and the only tweaks I made were adding a little white wine (to deglaze the pan, honestly, that's all!), and since I couldn't find anything called 'spring greens' here in CA, I used a bag with a mixture of turnip, collard and mustard greens. In addition, I added more carrots than were listed here, so that it really did feel like a well-rounded one-pot meal, and consequently added more stock, to ensure that they all cooked, and more pesto and creme fraiche to flavor the sauce.

Don't forget some bread to mop up all the deliciousness left behind by the spoon.


Spring Chicken One-Pot
serves 4

1 TBSP olive oil
8 boneless chicken thighs
1 onion, sliced
7 oz bacon, chopped
3 carrots, chopped
4 large handfuls of mixed greens (mustard, turnip, collard, kale...)
28 fl oz chicken stock
11 oz baby new potatoes (halve if necessary)
3 TBSP creme fraiche
3 TBSP pesto

1. Heat oil in a large heavy based pan with a lid. Season and brown chicken all over. Remove chicken to a plate and set aside. Cook onion and bacon in same pan for 5 mins until softened and lightly colored.
2. Return chicken to pan and add remaining ingredients except creme fraiche and pesto. Season with plenty of ground black pepper.
3. Bring to the boil, then cover and gently simmer for 30-40 minutes until potatoes are tender and chicken is cooked through.
4. Stir in creme fraiche and pesto.

Monday, April 22, 2013

Sunshine, in muffin form

OK, so I'm not boasting, but we get our fair share of sunshine around here in California. Don't hate me - I spent the first 29 years of my life in England, so I'm owed a bit of daylight, in its brightest form. Having said that, my dog decided that it was too hot for walking today - I say decided because he simply wandered off into a patch of long grass off the trail and lay down in the shade panting. The upside of this is that it gave me time to bake when I got home, and who am I to turn down a recipe called Sunny Zucchini Muffins? And these really are sunshine in muffin form.

I kind of like it when ingredients are used in less expected ways - don't get me wrong, zucchini is fabulous as a vegetable side, and a great addition to savory dishes, no doubt, but I love it in sweet dishes too. And for this recipe, since I didn't have the walnuts in the original recipe, I used some pine nuts I had in the cupboard (another impulse buy in bulk from Costco, with visions of homemade pesto all the time). Maybe it is my response to never having had a rebellious phase in my youth. I didn't dabble with danger: never got a tattoo, have never ridden a motorbike, have only two piercings, one in each ear, and never climbed out of my bedroom window for a secret liaison (wouldn't have actually been physically dangerous, given it was on the first floor, but the parental wrath would no doubt have made up for that). But whilst there is no skull and cross-bones or esoteric Japanese phrase adorning my pasty white British shoulder, I will make a stand against convention by using zucchini and pine nuts in a muffin. Oh, and while we're at it, my favorite cake is carrot cake. I know, I am a badass. Mess with me, and I may make putty of you by offering you a brownie or delicious pecan bar. Hah!

The recipe is taken from my favorite muffin cookbook 750 Best Muffin Recipes by Camilla Saulsbury. So for those of you not as fortunate with the weather, here really is a dose of sunshine in muffin form. Take a bite, lean back on that deck-chair, even if it is in the living room, and soak up some rays.


Sunny Zucchini Muffins
Makes 12

2 cups AP flour
1 TBSP baking powder
3/4 tsp salt
1/2 cup granulated sugar
2 eggs
1/2 cup milk
1/3 cup canola oil
2 tsp finely grated lemon zest
1 cup grated zucchini
1/2 cup toasted pine nuts
1/2 cup golden raisins

1. Preheat oven to 400 degrees F. Spray cups of 12-cup muffin tin with canola oil spray.
2. In a large bowl, whisk together flour, baking powder and salt.
3. In a medium bowl, whisk together sugar and eggs until well blended. Whisk in milk, oil, and lemon zest until blended.
4. Add egg mixture to flour mixture and stir until just blended.
5. Gently fold in zucchini, raisins and pine nuts.
6. Use a large scoop to divide batter evenly between muffin cups of prepared tin.
7. Bake in preheated oven for 20-25 mins, or until tops are golden and a toothpick inserted in the center of a muffin comes out clean.
8. Let cool in pan on rack for 5 minutes and then remove muffins to a rack to cool.

Sunday, April 21, 2013

Im-pulse Salad

Do you ever find yourself wandering around the supermarket, and you notice a product you've never seen before, and pick it up, thinking "Oooh, that looks good. I'm sure I could use that for something yummy". Such impulse buys are all very well, but more often than not, I find that they sit for weeks, drifting ever farther back in the fridge, neglected.  And many times, when they surface, they get thrown out when you realize it is already several weeks after the best before date. Hopefully that's not just me.

The most recent such impulse buy was this:


I say 'recent', but these poor neglected lentils have actually been sitting at the back of the fridge behind the yoghurt for a number of weeks. Fortunately, judging by the use-by date, they keep for months, thanks to the technological benefits of vacuum packaging. So, having found them today, I took advantage of this and decided to actually use them, lest those poor lentils feel completely unloved.

Having removed them from the package, I was obviously thrilled to discover they were quite possibly one of the least attractive items in my fridge. Quite frankly, once freed from their plastic haven, they plopped into the bowl resembling something like a brick, a brick the green-brown-black color of the puddles that my dog inexplicably likes to drink from while out walking. Fortunately, unlike the puddles, they were at least odorless. But you could build houses from these bricks they are so dense. Undetered, I managed to use my fingers to gently prise the lentils apart and ended up with a slightly more attractive bowl of lentils (although still the color of stagnant puddles). It was a step in the right direction, no doubt, but they were still not exactly screaming "Eat me". So I raided my fridge and gave them a makeover worthy of Ty Pennington by coming up with the following concoction, which I have to say is pretty tasty, and not at all unattractive. I have no doubt that at least one child will need a full detailed list of all ingredients before venturing to taste a forkful, but I am reasonably confident that with full disclosure, they will all eat it. And if not, my lunch tomorrow is sorted!

If nothing else, this salad is a lesson in the potential of impulse buys, not to mention the potential of pulses, hence the name I've given the dish. Remember what I said about the Brits and puns? Ha! Best to just humor us, seriously...

Im-pulse Salad


Salad:
1 package of steamed lentils (Trader Joes' package is 17.6oz - if you can't get this, just cook up some green lentils in roughly the same quantity)
1 15.5oz can garbanzo beans, drained and rinsed
5 oz grape tomatoes, quartered
3 spring onions, finely sliced
1 TBSP fresh chives, snipped
3 TBSP finely chopped fresh dill
4 oz soft goat cheese, crumbled

Vinaigrette:
3 fl oz olive oil
2 TBSP red wine vinegar
1 tsp dijon mustard
1/4 tsp salt
freshly ground black pepper

1. Mix together all of salad ingredients except for goat cheese.
2. Make vinaigrette by whisking together ingredients. Add about 1/4 of the vinaigrette to the salad. That is all you will need, to my taste anyway, but the rest is great on a green salad!
3. Gently fold through the goat cheese.

Friday, April 19, 2013

Another oldie but goodie

We are getting fonder and fonder of our ancient grains around here, and none more so than farro, and not just because it shares so many similarities with our last name. Trust me, there is nothing a traditional Brit loves more than a pun or play on words, and with farro and Farrar, the possibilities are endless!

The following dish was declared by my daughter to be "the best meal I've ever had". Now granted, we don't exactly take her to fine dining establishments very often, and neither are Michelin-starred chefs prone to popping in to cook dinner for us (although if there are any out there reading this with a free evening, my kitchen is always available!). Still, I took her exuberance as a pretty good sign that this dish was a keeper, especially as the meal was greeted with the same kind of response from all around the table, and left-overs were far from copious.

The recipe comes from a print-out I made and stashed away in a folder ages ago. According to the crumpled print-out, the source was saveur.com. My thanks go out to them :-) The farro works beautifully in a risotto, as the grains hold their own and don't become mushy. I've tweaked a couple of things, but not much.

Farro Risotto
(serves 5, with leftovers for two lunchboxes)

4 cups butternut squash, cut into 1/2" cubes (about one average sized squash)
6 TBSP olive oil
3/4 tsp dried sage
2 cups pearled or semi-pearled farro
6 TBSP butter
8 shallots, minced
3 cloves garlic, minced
3 TBSP fresh thyme leaves, chopped
1 cup white wine
2 cups chicken/vegetable stock
4 cups chopped shitake mushrooms (shitakes were kind of pricey, so I did a mixture of them and regular white mushrooms)
2 1/2 cups grated parmesan
2 TBSP creme fraiche

1. Heat oven to 400 degrees F. Toss squash with 4 TBSP olive oil and season with salt and pepper. Place on a baking sheet and roast for 25-30 minutes until edges are browned and crisp. Remove from oven and immediately sprinkle with sage.
2. Meanwhile bring 8 cups of water to a boil. Add farro, turn heat down and cook for 15 minutes. Drain, reserving 2 cups of the cooking liquid, and set aside.
3. In a large pan, heat remaining 2 TBSP olive oil over medium heat. Add mushrooms and saute for around 3 minutes. Remove from pan and set aside.


4. Melt butter in the same pan over medium heat. Add shallots, garlic and thyme and let cook until shallots begin to caramelize (around 3 minutes). Add farro and stir, coating each kernel with butter. Add in the white wine and let it simmer off.
5. Turn heat down to low and begin alternately adding in stock and farro cooking liquid, 1/2 cup at a time, stirring continuously with each addition. Let the liquid get absorbed by the farro before adding more. This should take 25-30 minutes. After the last addition, stir until about 1/2 of the liquid has been absorbed and then add in mushrooms and squash.
6. Fold 2 cups of parmesan and stir until just melted. Fold in creme fraiche and season with salt and pepper. Serve sprinkled with remaining parmesan.