Friday, July 26, 2013

A new addiction in the making

I feel it only reasonable to confess that I may be developing an addiction to lemongrass. There are probably worse afflictions, especially since, according to Wikipedia (so it MUST be true), lemongrass has anti-fungal qualities, is used in Brazil in a tea to combat anxiety, and in India is used to help relieve coughs and nasal congestion. But if I do let my new addiction run riot and start putting lemongrass in everything, from chocolate puddings to bacon sandwiches, please someone do let me know. It's like when someone has toilet paper stuck to their shoe, it may be awkward to point it out, but just do it selflessly. Another reason to find me immediate medical assistance if this goes that far, is that lemongrass can also apparently be used as a lure to attract swarms of honeybees. Yikes. So for heaven's sake, save me from myself, should the need arise.

Lemongrass is apparently (thanks again Wikipedia) also known as Cymbopogon. Fair enough, if my name was Cymbopogon, then I would probably want to go by an alias too. It is also known as Barbed Wire Grass. If you are going to sell yourself as a delicious (pain-free and safe) foodstuff, then that isn't a great name either. I kind of figure that Barbed Wire Grass is probably a nickname introduced by one of the meaner spices on the rack (Cayenne Pepper, perhaps) to ruin Lemongrass's street cred. Anyway, suffice to say, we'll stick to Lemongrass and keep its good-spice reputation intact.

As I mentioned, I have been on a bit of a health-kick this week (in case any of you locals glimpsed me out in public eating pizza the other night, please know that this was a tiny blip in a week of virtuousness, honestly). Today's lemongrass fix is therefore in the form of a salad. I served it up alongside some couscous, so that those carb-obsessed members of my family would not scream warnings of impending famine, and it went down very well. We don't allow bowl-licking in this house, but dare I suggest that my well-behaved children would have licked plates and serving bowls clean, if it were permitted. The dog meanwhile did have a pretty good lick as all the plates went in the dishwasher, which is a worthy endorsement, I feel. And thus far, he has not received any unwanted attention from swarms of bees.

The original recipe came from a magazine... yes, again I was clearly overzealously clipping recipes and failed to note which magazine. My apologies to the originator. I did tweak it somewhat because I didn't have any sambal oelek on hand (I know, horrifying gap in my cupboard), and I found the dressing too sweet for my taste, so added more soy sauce than originally recommended to make it less so. And of course, I had to increase the quantities for my own personal swarm.


Lemongrass Chicken Salad
Serves 6

Dressing:
2 tsp minced lemongrass (I used the Garden Gourmet stuff in a tube, because sometimes it is hard to find fresh)
2 TBSP vegetable/canola oil
2 TBSP coconut oil (or more veg/canola oil, if you cant get this)
4 TBSP lime juice
4 tsp sugar
1 tsp minced fresh ginger
2 tsp soy sauce
1/2 tsp minced garlic
salt and pepper to taste

Salad:
3 large boneless, skinless chicken breasts
2 TBSP honey
4 TBSP chili sauce
6 cups sliced romaine lettuce
3/4 cup red bell pepper, cut into matchstick strips
3/4 cup shredded carrot
1/2 cup chopped, roasted and salted cashews

1. To prepare dressing, add lemongrass to a small bowl with remaining ingredients, whisk together and set aside.
2. Mix together honey and chili sauce. Coat chicken breasts with the mixture, then cook on a well-oiled grill over medium heat for about 5 minutes each side, until chicken is cooked through.
3. Let chicken cool slightly and then cut into bite-size strips.
4. Toss romaine, bell pepper and carrot together in a large bowl. Drizzle dressing over, toss slightly, then sprinkle with chicken and cashews.


Thursday, July 25, 2013

Taking only one just isn't an option

We are extremely lucky to live in our neighborhood. Not only are our neighbors lovely, friendly people, but there is a regular opportunity to get together with them, with our local 'First Friday'. The first Friday of each month, one local household volunteers to host an early evening get together (which often becomes a late evening get together) inside or out, with the only requirement being that every family joining in the fun brings an appetizer to share and a nice bottle of wine to grace the drinks table for as long as it lasts (not long!).


The dish above is what I opted to take last time, for a number of reasons. Firstly, first Friday kind of crept up on me, so I needed something quick and easy to rustle up fast, and secondly, I was hosting, so I could whip these straight out of the oven when the timer beeped and serve them fresh and hot (they are undoubtedly less delicious if they have to sit around). I've messed with this recipe a few times over the years, changing the filling, and it is invariably delicious, but I do keep going back to the original. I realize that crescent dough is not available everywhere, and for that, the rest of the world has my sincere sympathies, but you could easily substitute puff pastry cut into 2" squares.

Mini Ham Puffs
From Pampered Chef's All the Best
Makes 24

oil spray
3 oz finely chopped ham
2 TBSP finely chopped onion
1/2 cup Swiss cheese, shredded/grated
1 egg
1 TBSP snipped fresh parsley
1 1/2 tsp Dijon mustard
1/8 tsp ground black pepper
1 package (8 oz) refrigerated crescent rolls (or puff pastry, see above)

1. Preheat oven to 350 degrees F.
2. Lightly spray a 24 cup mini muffin pan with oil spray.
3. Mix together ham, onion, cheese, egg, parsley, mustard and black pepper in a small bowl.
4. Unroll crescent dough on to a lightly floured surface and press over perforations to make one large rectangle. Using a pizza cutter, cut dough into 24 squares.
5. Press one square of dough into each cup in the sprayed muffin pan.
6. Place an equal amount of the filling into each cup (approximately 1 tsp in each).
7. Bake in oven for 12-14 minutes or until puffs are light golden brown.
8. Remove from pan and serve immediately.

Meatless Wednesday


Who says meatlessness has to stick to Mondays? In truth, I am trying to make sure that we eat veggie at least two or three evenings a week. This week, we are between food binges, having had a lovely foodie weekend eating out and barbecuing carnivorously last week, and getting ready to head up to Tahoe next week for more of the same, so I have been striving for healthy all week. This of course all ties in with the Cancel-Out Effect I described in a previous post (see Skinny Dipping, 7/15/13). One week of halo-polishing, vegetable-worshiping, health-conscious eating will of course cancel out the impact of the Kettle chip and cocktail binge I have planned for the sunny evenings on the deck in Tahoe. Of course.

Trouble with eating healthily is that I have three boys to feed in this house, all of whom have ridiculous appetites, not to mention hollow legs, and one other girl, who is going through puberty, and dancing for four hours each day, and whose dietary requirements currently more closely resemble the boys' than I ever thought possible. Faced with a pile of vegetables, and nought else to munch on, I have no doubt that there would be rumblings, of discontent and hungry tummies. Nevertheless, I have found that satisfaction can be achieved provided there is bread on the table as well, and that the veggie-laced dish is tasty enough to hush those rumblings on contact. This dish more than fitted the bill last night.

The recipe is taken from Cooking Light (August 2012), and I stuck pretty much to the original, except that I added green zucchini/courgettes to the yellow squash to make it even more pretty and colorful, and increased the quantity of everything (did I mention the hollow legs?)


Tomato, Squash and Red Pepper Gratin
Serves 6 'healthy' appetites or 8 normal human beings

6 tsp olive oil, divided
2 chopped red onions
2 1/2 cups chopped red bell pepper
1 lb yellow squash, cut into 1/4" thick slices
1/2 lb zucchini/courgette, cut into 1/4" slices
1 1/2 TBSP minced garlic
1 cup cooked quinoa
3/4 cup chopped fresh basil, divided
2 1/2 tsp chopped fresh thyme
1 tsp salt, divided
3/4 tsp black pepper
3/4 cup reduced fat milk
5 oz aged Gruyere cheese, shredded/grated
5 large eggs, lightly beaten
Cooking spray
2 1/2 oz of course breadcrumbs
2 beefsteak tomatoes, sliced into 8 slices each

1. Preheat oven to 375 degrees F.
2. Heat 4 tsp of oil in a large skillet. Add onion and cook for three minutes until translucent. Add bell pepper and cook for a further 2 minutes until becoming tender. Add squash and garlic and cook for 4 more minutes until squash is also becoming tender.
3. Place vegetable mixture in a large bowl and stir in quinoa, 1/2 cup basil, thyme, 1/2 tsp salt and black pepper.
4. In a separate bowl, combine eggs, remaining salt, cheese and milk with a whisk. Add mixture to bowl with vegetables and quinoa and stir to combine.
5. Spoon mixture into a large baking dish (mine is approximately 15" x 8") which is coated with cooking spray.
6. Add breadcrumbs and remaining oil to the skillet used to cook the vegetables and cook for three minutes until lightly toasted.
7. Arrange tomato slices over the vegetables in the baking dish, and then sprinkle toasted breadcrumbs evenly over the top.
8. Bake for 40 minutes or until topping is browned. Sprinkle with remaining basil before serving.

Friday, July 19, 2013

Who needs fried chicken?

I heard on the radio the other day that chicken-lovers in Gaza will pay to have a courier sneak through secret underground tunnels into Egypt, the nearest location with a KFC restaurant, and return with bags of greasy fried chicken. Several things are apparent from this - firstly, unfortunately the assumption that KFC is tasty has spread worldwide with epidemic proportions. Since when did KFC embody the pinnacle of chicken's tastiness? The Colonel would be proud. Secondly, people spend their money on crazy things.

We eat a lot of chicken in my house. At one point in my life, I actually gave up eating red meat, but when the kids came along, I fell off that bandwagon, in the desire to expose them to different meats, protein, iron and the like. I have since discovered so many delicious recipes incorporating beef and pork that I couldn't possibly give up red mean (curse you, cooking addiction!). But we still eat more white meat than red in this house, and I am always keen to discover different chicken recipes.

I found this recipe in Rachael Ray's Everyday magazine, something I often pick up at the checkout (yes, I am the person they aim for when they put the magazines there, and yes, my kids are the reason they put the candy there too). I liked the look of this one, because I am always trying to find more dishes to cook on the grill - being a Brit, I wasn't exactly raised on barbecued meals. And I admit, I was also sucked in by the claim that it cost less than $3 per serving, which even though my kids eat more than one serving each on a bad day, let alone a good day, makes it way cheaper than KFC (I did have to multiply the recipe below by 1 1/2 to serve my family of 5).


Buttermilk Chicken Kebabs with Chopped Salad
Serves 4

2/3 cup buttermilk
3 TBSP olive oil
1 TBSP chopped fresh thyme
zest of one lemon, plus 3 TBSP of juice
salt and pepper
1 1/2 lbs boneless skinless chicken thighs/breasts, cut into 1 1/2" pieces
1 head romaine lettuce, cut into 1" pieces
1 large hothouse cucumber, chopped
1/2 small red onion
1 cup red grapes, halved

1. Preheat grill to medium high
2. In a small bowl, mix together buttermilk, oil, thyme, lemon zest and juice.
3. In a medium bowl, toss the chicken with half of the buttermilk mixture.
4. Thread chicken on to 8 skewers.
5. Grill, turning frequently, until cooked through and browned in spots (13-15 minutes)

 
6. In a large bowl, toss romaine, cucumber, onion and grapes with remaining buttermilk mixture. Season and serve with kebabs.

Salvation, in chocolate form

You know those evenings when you just NEED dessert? Don't even try to tell me I'm the only one. That's not big and it's not clever.

Trouble is, unless you knew in advance that it was going to be that kind of afternoon, and happened to purchase the ingredients for something comfortingly chocolatey, it means either a trip to the store, or self-deprivation and disappointment. I don't know about you, but I didn't know in advance that my son was going to spill half a liter of maple syrup over the kitchen floor which required the floor to be mopped FOUR times before it was even possible to walk across it without sticking. And I didn't know that my other son was going to have a major tantrum because his evil mother won't allow him to play minecraft all day over the summer. And my daughter's hissy fit because I apparently haven't washed her ballet tights recently enough? Nope, didn't predict that one either. So besides needing to brush up on my ability to predict human tragedy in my household, I also need a stand-by recipe for such days, which uses only stuff that I happen to always have in the cupboard.

Well, thank you Pampered Chef, because, fortunately for the remaining threads of my sanity, the book 'Delightful Desserts' has just such a recipe. All in all, it is not my favorite book of all time - you could probably, in a fit of sarcasm, rename it '1001 uses for Whipped Topping'. Whilst whipped topping makes my children inordinately happy, I am somewhat suspicious of the stuff. What IS it? I kind of like to cook with things that I recognize. I'm not a raw foods addict or a health nut, but when a 'food' advertises itself as "Fun and Delicious", and looks like cream but is "Non-dairy", I get suspicious. And what is wrong with whipped cream (unless you are lactose intolerant, in which case you have my sincere sympathies)? Anyway, I digress. There are some total gems in the pages of Pampered Chef (and I have a serious addiction to their cooking equipment, which I adore). This is one of those gems, one that it is easy to whip up (hahaha) in no time at all, and which will satisfy the need that a long school-free summer's day spent with three tantrum-prone and obviously clumsy children can create.  And, as you can see from the photo below, it comes complete with it's own sauce underneath, so you don't even have to resort to a squeezy bottle of chocolate syrup that inexplicably does not include chocolate in the ingredients... All you need is ice cream and a spoon!


Brownie Pudding Cake
Serves 6-8

1 1/4 cups AP flour (= plain flour)
1 1/2 cups granulated sugar, divided
1/2 cup unsweetened cocoa powder, divided
2 tsp baking powder
1/2 tsp salt
3/4 cup milk
3 TBSP unsalted butter, melted
1 1/2 tsp vanilla, divided
1 cup chocolate chips
1 3/4 cups boiling water
Ice cream to serve

1. Preheat oven to 350 degrees F (180 degrees C).
2. Combine flour, 3/4 cup sugar, 1/4 cup cocoa, baking powder and salt in a large bowl. Add milk, melted butter and 1/2 tsp of the vanilla. Stir until smooth, then add chocolate chips and stir in.
3. Spread batter over the base of a baking dish (I used an oval dish, approximately 12" long and 3" deep)
4. In a small bowl, whisk together the remaining 3/4 cup granulated sugar and 1/4 cup cocoa. Gradually stir in boiling water and remaining 1 tsp vanilla. Carefully pour mixture over the batter in the baking dish.
5. Bake for 35 minutes in oven, or until a toothpick inserted in the center comes out clean. Cool for 15 minutes before serving with ice cream.

Wednesday, July 17, 2013

Pearly Plates

Food is about so much more than taste. Texture clearly plays a huge role too. That is the only way I can explain the horrified looks with which two of my children have always greeted avocado, for example. Let's face it, it IS a weird texture, and one not shared by many other foods. One of my daughter's favorite foods is pearl couscous, and again I think this has to do with the texture, as much as the taste, since couscous is really just a base for other flavors.

Clearly my daughter must have enamored herself to me recently, as I wanted to create a dish based on her favorite texture, and one of her favorite tastes, namely basil and pesto. Combine that desire to please her Preteen Highness with the contents of my fridge, and this is what I came up with. If I do say so myself, it was rather tasty, and her Majesty showered me with the kind of compliments which so rarely emanate from a preteen's mouth, that they should be savored as much as the food itself.


Smoked Mozzarella and Couscous salad with Basil Vinaigrette
Serves 4

1 1/2 cups pearl couscous (also called Israeli couscous)
3/4 cup basil leaves
1/3 cup olive oil
1 TBSP white wine vinegar
1 cup finely chopped orange bell pepper
1 cup halved/quartered cherry/grape tomatoes
1/3 cup toasted pine nuts
6 oz cubed smoked mozzarella
salt and pepper

1. Prepare couscous according to directions, drain and rinse in a colander with cold water. Set aside.
2. In a food processor, process the basil, oil and vinegar until smooth.
3. Toss together the dressing, couscous and remaining ingredients.

Saucy tendencies

The Farrars like nothing better than a bit of sauce. One of my big pet peeves is dry food, and most of my favorite dishes are soupy stews, which you couldn't possibly eat off of a plate for fear of flooding, and instead simply pour into a bowl, perhaps over a bed of rice or couscous. Trouble is, many of those dishes don't exactly lend themselves to summer evening dining. Even the faithfully saucy Farrars often don't feel much like sitting in front of a steaming bowl of sauciness, when it's 90 plus degrees outside until at least 2 hours after dark, when it just might dip into the 80s.

One exception is Thai food: despite the gloriously saucy nature of a green curry, there is something inherently summery about the combination of lime juice, coconut milk, and fresh herbs, which means you COULD eat it while sitting in front of a log fire in the middle of a snowstorm, but you WOULD also happily dig in during a mid-July heatwave, especially if you just happened to have a nice chilled sauvignon blanc or a crisp IPA just lying around waiting for an excuse to be consumed.

This recipe comes from an old and dog-eared issue of the British magazine Good Food (October 2002, no less), which I recently dug into. I was in the middle of a once-per-millenium purge, and went through all my old cooking magazines, clipping all the recipes I had never tried but might one day want to, and then organized them by category into a folder. I know, I now seem like one of those weird, and simultaneously annoying, organized people who sort their closet by color and keep their CDs in alphabetical order.  I am not, and never will be. Although I confess, I get so much pleasure out of my new recipe folder, that I can see the attraction. Unfortunately however, there are apparently only 24 hours in a day, and we are supposed to sleep for at least some of them. And besides, if I were one of those weird organized people, I would rob my children of the job of having to sift through decades of worthless 'stuff' after my demise, whilst sighing at each other and cursing their mother's hoarding tendencies. Seems to me, that is a rite of passage, of which I would be wrong to rob the little darlings.

Still, at least my brief foray into the land of methodical storage and purging of rubbish has allowed me to discover recipes such as this one. I had to tweak it a little - the idea of fish sauce scares me, I admit. It is like chicken and chicken nuggets - just what bits of the fish do they stuff in there?! So I replaced the fish sauce in the original with soy sauce. If you are fishy, as well as saucy, then you can of course substitute the same quantity of fish sauce in the ingredients list below. I also clearly do not qualify as a true Thai aficionado, since I do not own any Kaffir lime leaves, and would not know where to purchase them. To give a bit of lime zing to the sauce, I therefore used lime zest. If you want to be faithful to the original, substitute 6 kaffir lime leaves for the lime zest listed below. And I added some green beans, partly because otherwise they were going to decay at the bottom of my fridge, and partly because I at least strive to be a nutritionally-responsible parent, and a one-dish meal ought to have some vegetables in it!


Chicken with Lemongrass and Coconut
Serves 4

2 x 400ml cans coconut milk
2 TBSP soy sauce
3 cm (1.5") piece of ginger, finely chopped/grated
2 lemongrass stalks, finely sliced OR 2-3 TBSP lemongrass paste if you can't find fresh
1 TBSP fresh lime zest
1/2-1 fresh red chili, finely chopped
2 tsp light muscovado/light brown sugar
500g/1lb 2oz boneless, skinless chicken breast, cubed
10 oz fresh green beans, chopped into 1" lengths
2 TBSP fresh lime juice
good handful of fresh basil and cilantro/coriander, roughly chopped
jasmine rice to serve

1. Tip coconut milk, soy sauce, ginger, lemongrass, lime zest, chili and sugar into a large saucepan and bring to a gentle simmer. Cook uncovered at a relaxed bubble for 5 minutes.
2. Add chicken and green beans, cover and simmer for 15 minutes, until chicken is tender.
3. Stir in the lime juice, then scatter over the herbs before serving over rice in bowls.

Monday, July 15, 2013

Skinny Dipping

 
Yes, dips are full of fat. Whether it's cream, cheese, oil.. you name it, if it is fattening, then you can bet most dips have it in there. And you can also bet that you don't want to know how many calories are in your huge tortilla chip-ful of dip. Best just not to ask.

Lest you were hoping that I had come across some amazing calorie-free-but-just-as-tasty dips for your next party, let me be honest: these dips aren't exactly fat-free. BUT, as you can see, I served them not with chips, or carb-loaded bread, but with those delicious little baby bell peppers. I am therefore making use of the well-known 'Cancel-out effect'. You know the way you can cancel out a day of high calorie binging by spending a mere half hour in the gym on the stairmaster the following day? Or the way you can totally have a huge king-size snickers, because you walked the dog this morning, and the two cancel each other out? Well, this is the same thing - healthy bell peppers cancel out fatty, cheesy dips. So problem solved, you can skinny dip after all ;-)

Just in case you are not convinced by the Cancel-out effect (you cynic, you), just bring out these bowls of deliciousness on a special occasion, or at a party, where the multiple hands who are dipping in (and hopefully not double-dipping) will ensure that you don't polish off the whole bowl solo.

Roasted Red Pepper Hummus

1 15 oz can garbanzo beans (chick peas), drained and rinsed
1/2 cup roasted red peppers (I use the kind sold in a jar - too much like hard work to roast your own)
3 TBSP lemon juice
3 TBSP tahini
2 cloves garlic, minced
1/2 tsp ground cumin
1/2 tsp cayenne pepper
1/4 tsp salt
1 TBSP chopped fresh parsley

Process all ingredients in a food processor until smooth. If the mixture is too thick, add a little more lemon juice.


Fresh Basil Goat Cheese Dip

1 cup chevre (soft goat cheese, not the rinded type, the type that ressembles crumbly cream cheese)
1 cup loosely packed fresh basil leaves
1/2 cup mayonnaise
1/2 cup whipping cream
2 TBSP fresh lemon juice
salt and black pepper to taste

Process all ingredients together in a food processor until smooth.

Friday, July 12, 2013

My big fat Greek lasagna

One of my favorite cookbooks is the fantastically named 9 x 13: The Pan That Can. Even if the contents were dire, you have to love it for the name. As the name implies, everything in there is cooked in a 9" x 13" pan, so if you have one of those, then you are ready to go, very satisfying if, like me, you get very frustrated when you find that a recipe requires a 2.85" deep x 13.76" diameter non-stick springform pan with fluted edges...

The book was recommended to me by a good friend, let's call her Kate, whom I mention not only to express my gratitude in public for having referred me to the book, but also because she will find it hilarious that she is mentioned in a cooking blog, since she often professes to be hopeless in the kitchen. I have to say, I have eaten at her house many times, and have always eaten well.

I am a sucker for lasagna. Since my dad always claimed not to like lasagna, we never had it home when I was growing up, a deprivation for which I'm not sure I have yet forgiven him, not least because, pretty much the moment I left home, he saw the error of his ways, and now eats lasagna with gusto. I therefore feel the need to make up for lost time, and make as many different versions of the dish as possible. Not only is it a delicious meal, which can be 'gussied up' enough to serve to company, but it is also a one-dish meal, so you can prepare it in advance, pop it in the oven on a timer, and all you have to do is make a salad (and drink some wine before your guests arrive... just to make sure it's OK, you understand). Far more conducive to an enjoyable evening, I find.


Greek-Style Lasagna
Serves 8

16 dried (no pre-cook necessary) lasagna sheets (I used Barilla)
1 lb ground lamb or ground beef
1 medium onion, chopped
2 cloves garlic, minced
1 8oz can tomato sauce (or passata)
1/4 cup dry red wine
1 tsp crushed dried oregano
1/4 tsp ground cinnamon
1 egg, beaten
3 TBSP butter
3 TBSP AP flour
1/4 tsp ground black pepper
1 3/4 cups milk (I use 2% or semi-skimmed)
1/2 cup grated parmesan
2 eggs, beaten
4 oz pitted calamata olives, roughly chopped
8 oz feta cheese, crumbled
1 cup shredded cheddar
snipped chives to serve

1. Preheat oven to 350 degrees F.
2. In a large skillet, cook ground meat, onion and garlic until meat is cooked through, breaking up the meat as you cook. Stir in tomato sauce, wine, oregano and cinnamon and bring to the boil. Reduce heat and simmer uncovered for 10 minutes. Quickly stir in the one beaten egg and set aside.
3. In a medium pan, melt butter, then stir in flour and pepper. Add milk gradually, stirring continuously. Cook and stir until thickened and bubbly. Stir in 1/4 cup of the parmesan and set aside.
4. In a small bowl, combine the two beaten eggs and the remaining 1/4 cup of grated parmesan. Set aside.
5. Spread about 3 TBSP of the sauce over the base of the 9x13 pan. Cover with a single layer of lasagna sheets. Spread with 1/3 of the meat sauce, 1/3 of the remaining cheese sauce and 1/3 of the olives. Drizzle with 1/3 of the egg-parmesan mixture, then sprinkle with 1/3 of the feta and 1/3 of the cheddar. Repeat layers two more times, starting with lasagna and ending with cheddar cheese.
6. Bake uncovered for 35-40 minutes or until heated through and starting to brown on top. Let stand for 10 minutes before serving and sprinkle with snipped chives.

Saturday, July 6, 2013

The fruits of our labors

My husband and I are not exactly green-fingered. When we used to live in the UK, we lived in the middle house in a row of three. On the one side, lived a retired couple, whose fingers were VERY green. They spent what appeared to be every waking moment in the garden making sure that each blade of grass felt cared for. As for Tim and I, we would have a panic gardening session about once every couple of months when we raced to save everything still vaguely alive in our garden from imminent death by neglect, and then swear that we would be out there more often, knowing from experience that this was futile. Fortunately, for appearances at least, on the other side of our house lived a family who, as far as I could tell in the three years we lived there, never felt the need for a panic gardening session, and were clearly going for 'the natural' look in their yard. The word 'unkempt' doesn't quite capture it, but you get my drift. We contented ourselves by not being the best looking garden on the block, but not being the worst either.

Now that we live in California, we spend a lot more time outside and are fortunate to have a large yard. Knowing our talents, and time, are, to put it mildly, limited, we have a great gardener who takes care of things for us once a week. Living in California also means that there are a wide variety of fruit trees we can grow. We inherited an old apricot tree which periodically looks perilously close to death, and then at other times, has a sudden lease of new life and gives us so many apricots that we don't know what to do with them. This year is one of the latter.


I see plenty of jam and pies in our future, and the apricots are delicious just eaten as is. Sweet and luscious:


But I also wanted to try something new with the fruit, so I googled apricots and found this recipe from a 2003 edition of Gourmet.

Calling this post 'The fruits of our labors' is probably pushing it, given that we didn't plant the tree, and do very little to care for it, beyond paying to have it trimmed and cared for by those far more skilled than us. But we did go out there and pick the fruit!

 
Even in years with a more scant harvest, I will be making this again, and probably with other fruits too. It was one of those dishes, where the first mouthful was greeted with the kind of sighs and raised eyebrows that every chef should experience more often. We had it warm with vanilla ice-cream that evening, but it was also delicious on its own, at room temperature, the following day.


Fresh Apricot Upside-Down Cake
Serves 8-10

Topping:
1 stick (1/2 cup/4oz) unsalted butter
3/4 cup packed light brown sugar
10-12 small (2-2 1/4") fresh apricots (around 1 1/4lbs), halved lengthwise and pitted

Cake:
1 3/4 cups AP flour
1 1/2 tsp baking powder
1/2 tsp baking soda
1/2 tsp salt
1 stick (1/2 cup/4oz) unsalted butter, softened
3/4 cup granulated sugar
1 1/2 tsp vanilla extract
1/4 tsp almond extract
2 large eggs (at room temp for at least 30 mins)
3/4 cup well-shaken buttermilk

1. Preheat oven to 375 degrees F. Spray a 10" diameter, (preferably spring-form) baking pan with canola oil spray.
2. Make topping: heat butter in a skillet over moderate heat until foam subsides, but don't let it brown. Reduce heat to low and sprinkle brown sugar evenly over the butter. Cook undisturbed for 3 minutes (not all of the sugar will have melted). Remove from the heat and tip into the base of a the prepared baking tin.
3. Arrange the apricot halves, cut sides down, close together, on top of the brown sugar mixture in the baking tin.
4. Make cake batter: sift together the flour, baking powder, soda and salt into a small bowl.
5. Beat together the softened butter, sugar and extracts in a large bowl for 2-3 minutes (in a stand mixer, for 3-4 minutes, if you are using a handheld mixer). Beat in eggs, one at a time, then continue to beat until the mixture is creamy and doubled in volume (about 3 minutes).
6. Reduce speed to low and add flour mixture in 3 batches, alternately with buttermilk, beginning and ending with flour mixture. Beat until just combined.
7. Gently spoon batter over apricots and spread evenly.
8. Bake cake in middle of the oven until golden brown and a wooden toothpick inserted in the center comes out clean, about 40-45 minutes.
9. Remove from the oven and immediately invert on to a large plate and remove baking tin. Serve warm or at room temperature.

Minty Fresh

I'm sure I've mentioned before that I love mint. If you need a favor, just bring me a Pimm's or make me a mojito :-)  I've recently discovered how tasty mint is in savory dishes as well as sweet ones (and cocktails!). It has a fresh taste that just smacks of summer to me.

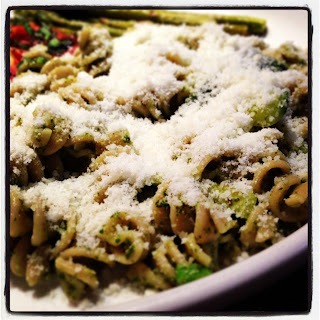
This recipe will no doubt contribute to my love affair with mint. I clipped it from a Rachael Ray magazine. Rachel makes it with tagliatelle, but I find tagliatelle, linguine and spaghetti just too much like hard work to cook and eat well (and neither did I want to watch the kids struggle with it!), so I opted for rotini. and served it with some slow roasted tomatoes with basil and some roasted asparagus sprinkled with asparagus.


Delish, delish, delish.

Rotini with Zucchini and Mint Pesto
Serves 4

2 TBSP  plus 1/4 cup olive oil
2 zucchini, cut into matchsticks
3-4 spring onions, white and greens finely chopped
6 cloves garlic, chopped
salt and pepper
1 1/2 cups fresh mint leaves
1/2 cup flat leaf parsley, packed
1/4 cup toasted pistachios
1/4 cup finely grated parmesan
1/4 cup finely grated pecorino romano
1 lemon, zested and juiced
1 1lb rotini pasta
Grated parmesan/pecorino to serve

1. Bring a large pot of water to boil, add some salt and cook pasta according to directions.
2. In a large skillet, heat 2 TBSP olive oil over medium heat. Add zucchini and lightly brown (6-8 minutes). Add the onions and half of the garlic, and season with salt and pepper. Reduce the heat and keep warm until the pasta is done.
3. In a food processor, pulse the mint, parsley, remaining garlic, nuts, cheeses, lemon zest, juice and about 1/4 cup of olive oil to form a pesto. Transfer pesto to a large serving bowl.
4. When pasta is done drain it over a bowl and stir 1 cup of the pasta cooking water into the pesto in the serving dish. Add pasta and zucchini mixture to the bowl and toss to combine. Serve topped with more grated cheese.

Wednesday, July 3, 2013

Berry Bonanza


Last Sunday we went berry picking over on the coast, between Pescadero and Davenport. Beautiful sunny day, and  row upon row of beautiful berries. The strawberries there are slim pickings by now, but there are tayberries and olallieberries in abundance. If you are local, then you should definitely check them out: Swanton Berry Farm


 An afternoon's berry picking does of course leave one with a dilemma - what to do with the results! I confess I had never tried a tayberry before, but they are delicious- a cross between a blackberry and a raspberry. In case you are romantically envisaging two adjacent plants coincidentally growing towards one another to create a tasty happy accident, then scratch that. Apparently the tayberry was created in a lab by a Scottish scientist. Oh well, they are still tasty! They look kind of like a longer raspberry, but taste sweeter than raspberries. The difficulty when picking them is that, as far as we could tell, the colour varies from red, when they are unripe to... err a slightly different red when they are ripe. The only solution was to taste test them to find out what colour was the optimum (oh what a horrid job!) Once you have the colour in your head , it is easy pickings.
 

So what to do with this gorgeous haul? I did what every self-respecting cook does and googled it, serendipitously coming across a lovely tart recipe on a blog ingeniously called Swallowing the Seasons. (I will definitely be checking back there regularly - some beautiful recipes). Now, I often baulk at making my own dough, but I also found a recipe for pate sablee, a French sweet pastry, for the base, and thought, what the heck, nothing ventured nothing gained. (The fact that I'd been out in the sun all day, and had already had more than a sample of the wine we picked up at a local winery, probably also contributed to the decision!) Of course, if time is pressing, then by all means use a simple pre-made pastry, but this one is a lovely shortbready crust, which is worth the effort, if you can.


Tayberry Tart
Serves 5 very greedy Farrars, or 8 normal human beings

For the pate sablee (from About.com):
1 1/4 cups AP flour
1 1/4 cups powdered sugar
1/2 cup finely ground almonds
1/4 tsp salt
1/2 cup cold unsalted butter

Tart filling (from Swallowing the Seasons):
6 large egg yolks
1 1/2 cups heavy cream
4 TBSP white sugar
1 pt fresh rinsed tayberries (or raspberries), left to dry on kitchen roll
2 tsp confectioners/powdered sugar

1. First make the pastry. Prepare a tart pan (mine is 11" in diameter and 1 1/4" deep), by spraying lightly with canola oil spray. In a food processor, pulse together flour, sugar, almonds and salt. Add chilled butter and continue to pulse until mixture resembles coarse breadcrumbs with a few pea-sized pieces of butter still visible. Add egg, and pulse until the mixture forms a ball that holds together. (If you don't have a processor, you can totally do all this by hand and with a pastry cutter, but don't handle it so much that the butter starts to melt).
2. Make dough into a disk shape and wrap in cling wrap. Place in the freezer for 40 minutes before working with it. While it is in the freezer, preheat oven to 375 degrees F.
3. Roll out dough as much as possible on a floured countertop, but this is a temperamental dough. Don't worry though; when it starts to crack too much, or stick to the counter, put whatever shape you have into the pan and press into the tin, then trim off any excess. (This recipe made too much for my tart, but I baked the remainder into little cookies)  Line pastry shell with parchment paper and fill with baking beans, then bake in the preheated oven for around 20 minutes until the shell is starting to brown at the edges. Remove the baking beans and parchment paper and continue to bake for a further 5-10 minutes to dry out the pastry. Remove from the oven and set aside.
4. Make the filling: Use a handheld mixer to beat together the egg yolks, cream and sugar. Pour the mixture into the shell, but not all the way to the top. (Again, this recipe makes too much of the custard filling for an 11" tart tin, so you will have some left over unless your tin is bigger than mine).
5. Carefully place the tayberries into the custard, distributing them evenly across the tart. They will stick up out of the custard.
6. Place tart in the center of the oven and bake for a further 20 minutes until the center of the tart is almost set (only slightly jiggly), and the custard is starting to brown.
7. Cool completely to serve (tart will set further while it is cooling), then dust with powdered sugar.


Tuesday, July 2, 2013

Currying Flavour

As I have shared here before, our family are wimps when it comes to really HOT spicy food. My husband claims to be fine ordering the items marked with little red chilis on menus, but when he is gulping down water and gasping "This is g..r..e..a..t {pant} {pant}. Really it is",  it's kind of like when a man has a gaping wound and tells you in a strangled voice "Oh no {wince} {wince},  it doesn't really hurt." You know it does. There is just a macho need to deny the pain, lest anyone call them a wuss.

As for me, I'm completely content to be a wuss, and admit it freely in public, particularly since less heat does NOT mean less flavour. This dish is a case in point - it is a curry, but not one that is particularly hot. And yet, it is so deliciously rich and tasty you won't for a moment miss the heat. And if you are determined to flaunt your non-wuss-ish-ness, then by all means add another chili to the recipe.

When I called this post "Currying Flavour", I was not merely succumbing to the attraction of a lovely pun. No, I was also referring to the fact that all five of the Farrars lapped up this dish. There was none left, not a morsel, and of course they were all then gushing with gratitude and love for their chef-mummy/wife. OK, so I made up the last bit - but they did eat it all, and with enthusiasm. That is as good as it gets.


Indian-Style Chicken with Pureed Spinach
Adapted from Judith Finlayson's The Healthy Slow Cooker
Serves 6

3 lbs skinless, boneless chicken thighs, trimmed of fat
1/4 cup freshly squeezed lemon juice
2 TBSP olive oil
2 onions, thinly sliced
1 TBSP minced ginger root
1 TBSP minced garlic
3/4 TBSP ground cumin
2 tsp ground coriander
1 tsp turmeric
1 tsp ground black pepper
1/2 tsp salt
1 14 oz can diced tomatoes in juice (no salt added)
2 10 oz packages of frozen chopped spinach, thawed
1 jalapeno, finely chopped
1 cup chicken stock
juice of 1 lemon

1. Combine chicken with 1/4 cup lemon juice in a large bowl, toss and set aside for 20-30 minutes.
2. Heat oil in a skillet and cook onions over medium-high heat until they begin to colour, about 5 minutes. Reduce heat to medium and cook, stirring, until golden, about 12 minutes.
3. Add ginger, garlic, cumin, coriander, turmeric, pepper and salt and cook stirring for a further minute. Stir in tomatoes with juice and bring to a boil. Remove from heat.
4. Arrange chicken on base of slow cooker stoneware, and pour tomato mixture over the top. Cover and cook on LOW for 6 hours or HIGH for 3 hours, by which time chicken should be fully cooked and falling apart.
5. In a blender or food processor, combine spinach, chili and stock until you get a smooth puree. Add to chicken and stir well. Cover and cook on HIGH for 20 minutes until mixture is bubbling. Just before serving, stir in lemon juice.