Saturday, July 6, 2013

The fruits of our labors

My husband and I are not exactly green-fingered. When we used to live in the UK, we lived in the middle house in a row of three. On the one side, lived a retired couple, whose fingers were VERY green. They spent what appeared to be every waking moment in the garden making sure that each blade of grass felt cared for. As for Tim and I, we would have a panic gardening session about once every couple of months when we raced to save everything still vaguely alive in our garden from imminent death by neglect, and then swear that we would be out there more often, knowing from experience that this was futile. Fortunately, for appearances at least, on the other side of our house lived a family who, as far as I could tell in the three years we lived there, never felt the need for a panic gardening session, and were clearly going for 'the natural' look in their yard. The word 'unkempt' doesn't quite capture it, but you get my drift. We contented ourselves by not being the best looking garden on the block, but not being the worst either.

Now that we live in California, we spend a lot more time outside and are fortunate to have a large yard. Knowing our talents, and time, are, to put it mildly, limited, we have a great gardener who takes care of things for us once a week. Living in California also means that there are a wide variety of fruit trees we can grow. We inherited an old apricot tree which periodically looks perilously close to death, and then at other times, has a sudden lease of new life and gives us so many apricots that we don't know what to do with them. This year is one of the latter.


I see plenty of jam and pies in our future, and the apricots are delicious just eaten as is. Sweet and luscious:


But I also wanted to try something new with the fruit, so I googled apricots and found this recipe from a 2003 edition of Gourmet.

Calling this post 'The fruits of our labors' is probably pushing it, given that we didn't plant the tree, and do very little to care for it, beyond paying to have it trimmed and cared for by those far more skilled than us. But we did go out there and pick the fruit!

 
Even in years with a more scant harvest, I will be making this again, and probably with other fruits too. It was one of those dishes, where the first mouthful was greeted with the kind of sighs and raised eyebrows that every chef should experience more often. We had it warm with vanilla ice-cream that evening, but it was also delicious on its own, at room temperature, the following day.


Fresh Apricot Upside-Down Cake
Serves 8-10

Topping:
1 stick (1/2 cup/4oz) unsalted butter
3/4 cup packed light brown sugar
10-12 small (2-2 1/4") fresh apricots (around 1 1/4lbs), halved lengthwise and pitted

Cake:
1 3/4 cups AP flour
1 1/2 tsp baking powder
1/2 tsp baking soda
1/2 tsp salt
1 stick (1/2 cup/4oz) unsalted butter, softened
3/4 cup granulated sugar
1 1/2 tsp vanilla extract
1/4 tsp almond extract
2 large eggs (at room temp for at least 30 mins)
3/4 cup well-shaken buttermilk

1. Preheat oven to 375 degrees F. Spray a 10" diameter, (preferably spring-form) baking pan with canola oil spray.
2. Make topping: heat butter in a skillet over moderate heat until foam subsides, but don't let it brown. Reduce heat to low and sprinkle brown sugar evenly over the butter. Cook undisturbed for 3 minutes (not all of the sugar will have melted). Remove from the heat and tip into the base of a the prepared baking tin.
3. Arrange the apricot halves, cut sides down, close together, on top of the brown sugar mixture in the baking tin.
4. Make cake batter: sift together the flour, baking powder, soda and salt into a small bowl.
5. Beat together the softened butter, sugar and extracts in a large bowl for 2-3 minutes (in a stand mixer, for 3-4 minutes, if you are using a handheld mixer). Beat in eggs, one at a time, then continue to beat until the mixture is creamy and doubled in volume (about 3 minutes).
6. Reduce speed to low and add flour mixture in 3 batches, alternately with buttermilk, beginning and ending with flour mixture. Beat until just combined.
7. Gently spoon batter over apricots and spread evenly.
8. Bake cake in middle of the oven until golden brown and a wooden toothpick inserted in the center comes out clean, about 40-45 minutes.
9. Remove from the oven and immediately invert on to a large plate and remove baking tin. Serve warm or at room temperature.

Minty Fresh

I'm sure I've mentioned before that I love mint. If you need a favor, just bring me a Pimm's or make me a mojito :-)  I've recently discovered how tasty mint is in savory dishes as well as sweet ones (and cocktails!). It has a fresh taste that just smacks of summer to me.

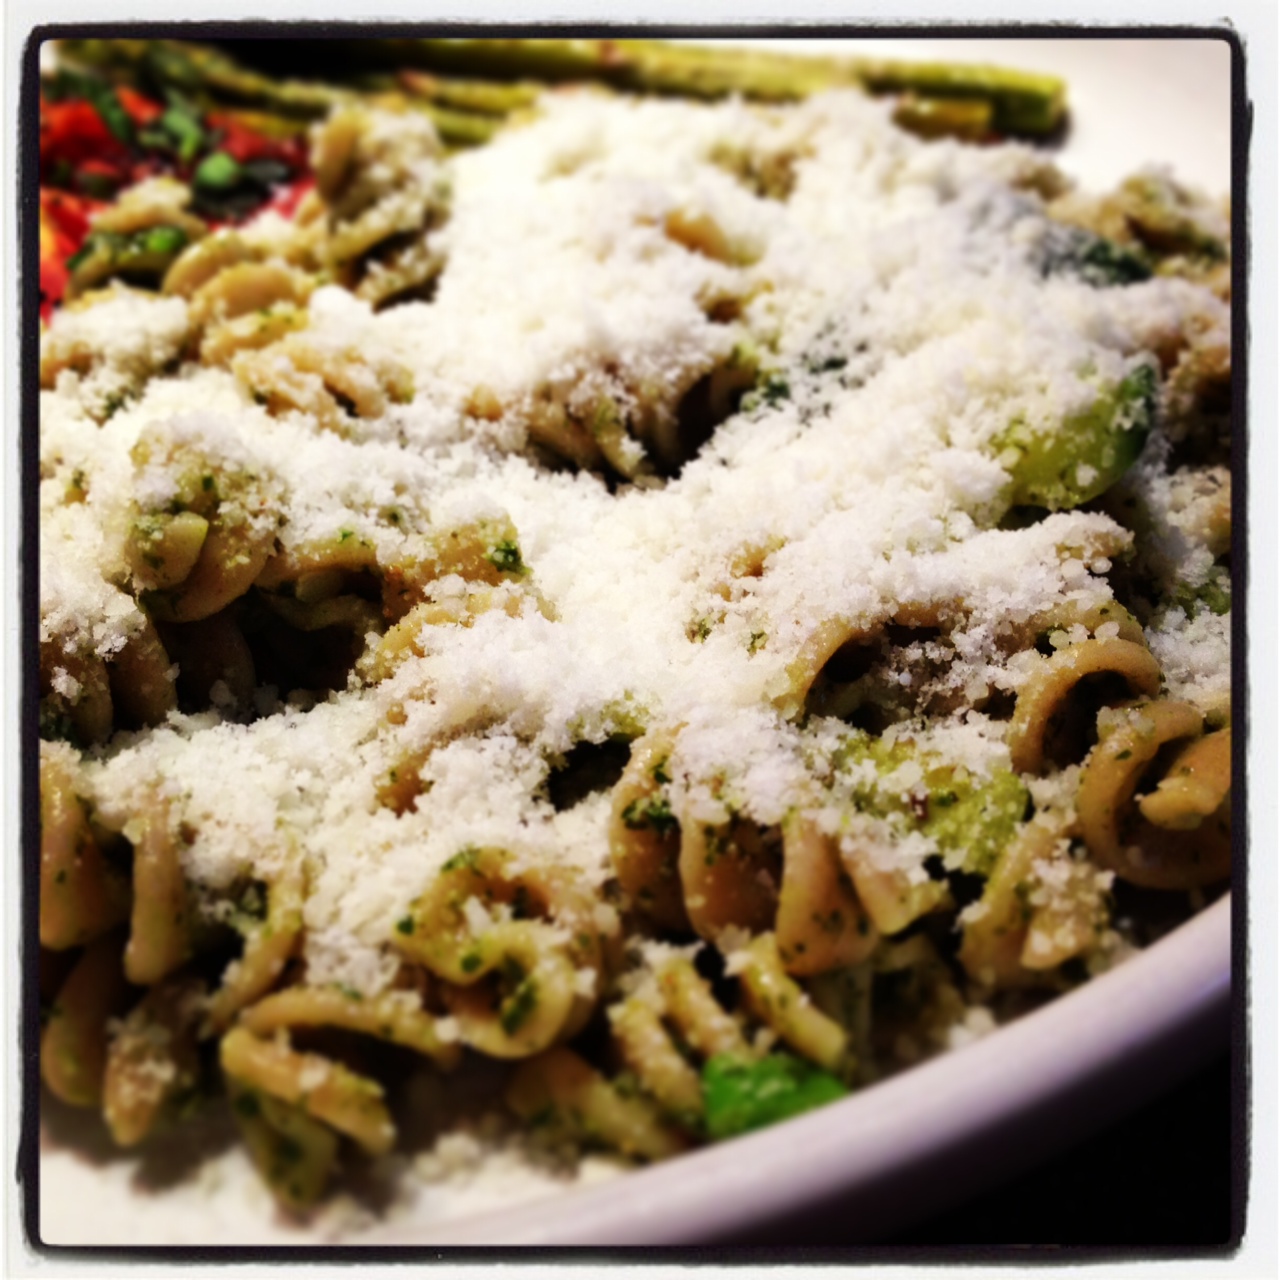
This recipe will no doubt contribute to my love affair with mint. I clipped it from a Rachael Ray magazine. Rachel makes it with tagliatelle, but I find tagliatelle, linguine and spaghetti just too much like hard work to cook and eat well (and neither did I want to watch the kids struggle with it!), so I opted for rotini. and served it with some slow roasted tomatoes with basil and some roasted asparagus sprinkled with asparagus.


Delish, delish, delish.

Rotini with Zucchini and Mint Pesto
Serves 4

2 TBSP  plus 1/4 cup olive oil
2 zucchini, cut into matchsticks
3-4 spring onions, white and greens finely chopped
6 cloves garlic, chopped
salt and pepper
1 1/2 cups fresh mint leaves
1/2 cup flat leaf parsley, packed
1/4 cup toasted pistachios
1/4 cup finely grated parmesan
1/4 cup finely grated pecorino romano
1 lemon, zested and juiced
1 1lb rotini pasta
Grated parmesan/pecorino to serve

1. Bring a large pot of water to boil, add some salt and cook pasta according to directions.
2. In a large skillet, heat 2 TBSP olive oil over medium heat. Add zucchini and lightly brown (6-8 minutes). Add the onions and half of the garlic, and season with salt and pepper. Reduce the heat and keep warm until the pasta is done.
3. In a food processor, pulse the mint, parsley, remaining garlic, nuts, cheeses, lemon zest, juice and about 1/4 cup of olive oil to form a pesto. Transfer pesto to a large serving bowl.
4. When pasta is done drain it over a bowl and stir 1 cup of the pasta cooking water into the pesto in the serving dish. Add pasta and zucchini mixture to the bowl and toss to combine. Serve topped with more grated cheese.

Wednesday, July 3, 2013

Berry Bonanza


Last Sunday we went berry picking over on the coast, between Pescadero and Davenport. Beautiful sunny day, and  row upon row of beautiful berries. The strawberries there are slim pickings by now, but there are tayberries and olallieberries in abundance. If you are local, then you should definitely check them out: Swanton Berry Farm


 An afternoon's berry picking does of course leave one with a dilemma - what to do with the results! I confess I had never tried a tayberry before, but they are delicious- a cross between a blackberry and a raspberry. In case you are romantically envisaging two adjacent plants coincidentally growing towards one another to create a tasty happy accident, then scratch that. Apparently the tayberry was created in a lab by a Scottish scientist. Oh well, they are still tasty! They look kind of like a longer raspberry, but taste sweeter than raspberries. The difficulty when picking them is that, as far as we could tell, the colour varies from red, when they are unripe to... err a slightly different red when they are ripe. The only solution was to taste test them to find out what colour was the optimum (oh what a horrid job!) Once you have the colour in your head , it is easy pickings.
 

So what to do with this gorgeous haul? I did what every self-respecting cook does and googled it, serendipitously coming across a lovely tart recipe on a blog ingeniously called Swallowing the Seasons. (I will definitely be checking back there regularly - some beautiful recipes). Now, I often baulk at making my own dough, but I also found a recipe for pate sablee, a French sweet pastry, for the base, and thought, what the heck, nothing ventured nothing gained. (The fact that I'd been out in the sun all day, and had already had more than a sample of the wine we picked up at a local winery, probably also contributed to the decision!) Of course, if time is pressing, then by all means use a simple pre-made pastry, but this one is a lovely shortbready crust, which is worth the effort, if you can.


Tayberry Tart
Serves 5 very greedy Farrars, or 8 normal human beings

For the pate sablee (from About.com):
1 1/4 cups AP flour
1 1/4 cups powdered sugar
1/2 cup finely ground almonds
1/4 tsp salt
1/2 cup cold unsalted butter

Tart filling (from Swallowing the Seasons):
6 large egg yolks
1 1/2 cups heavy cream
4 TBSP white sugar
1 pt fresh rinsed tayberries (or raspberries), left to dry on kitchen roll
2 tsp confectioners/powdered sugar

1. First make the pastry. Prepare a tart pan (mine is 11" in diameter and 1 1/4" deep), by spraying lightly with canola oil spray. In a food processor, pulse together flour, sugar, almonds and salt. Add chilled butter and continue to pulse until mixture resembles coarse breadcrumbs with a few pea-sized pieces of butter still visible. Add egg, and pulse until the mixture forms a ball that holds together. (If you don't have a processor, you can totally do all this by hand and with a pastry cutter, but don't handle it so much that the butter starts to melt).
2. Make dough into a disk shape and wrap in cling wrap. Place in the freezer for 40 minutes before working with it. While it is in the freezer, preheat oven to 375 degrees F.
3. Roll out dough as much as possible on a floured countertop, but this is a temperamental dough. Don't worry though; when it starts to crack too much, or stick to the counter, put whatever shape you have into the pan and press into the tin, then trim off any excess. (This recipe made too much for my tart, but I baked the remainder into little cookies)  Line pastry shell with parchment paper and fill with baking beans, then bake in the preheated oven for around 20 minutes until the shell is starting to brown at the edges. Remove the baking beans and parchment paper and continue to bake for a further 5-10 minutes to dry out the pastry. Remove from the oven and set aside.
4. Make the filling: Use a handheld mixer to beat together the egg yolks, cream and sugar. Pour the mixture into the shell, but not all the way to the top. (Again, this recipe makes too much of the custard filling for an 11" tart tin, so you will have some left over unless your tin is bigger than mine).
5. Carefully place the tayberries into the custard, distributing them evenly across the tart. They will stick up out of the custard.
6. Place tart in the center of the oven and bake for a further 20 minutes until the center of the tart is almost set (only slightly jiggly), and the custard is starting to brown.
7. Cool completely to serve (tart will set further while it is cooling), then dust with powdered sugar.


Tuesday, July 2, 2013

Currying Flavour

As I have shared here before, our family are wimps when it comes to really HOT spicy food. My husband claims to be fine ordering the items marked with little red chilis on menus, but when he is gulping down water and gasping "This is g..r..e..a..t {pant} {pant}. Really it is",  it's kind of like when a man has a gaping wound and tells you in a strangled voice "Oh no {wince} {wince},  it doesn't really hurt." You know it does. There is just a macho need to deny the pain, lest anyone call them a wuss.

As for me, I'm completely content to be a wuss, and admit it freely in public, particularly since less heat does NOT mean less flavour. This dish is a case in point - it is a curry, but not one that is particularly hot. And yet, it is so deliciously rich and tasty you won't for a moment miss the heat. And if you are determined to flaunt your non-wuss-ish-ness, then by all means add another chili to the recipe.

When I called this post "Currying Flavour", I was not merely succumbing to the attraction of a lovely pun. No, I was also referring to the fact that all five of the Farrars lapped up this dish. There was none left, not a morsel, and of course they were all then gushing with gratitude and love for their chef-mummy/wife. OK, so I made up the last bit - but they did eat it all, and with enthusiasm. That is as good as it gets.


Indian-Style Chicken with Pureed Spinach
Adapted from Judith Finlayson's The Healthy Slow Cooker
Serves 6

3 lbs skinless, boneless chicken thighs, trimmed of fat
1/4 cup freshly squeezed lemon juice
2 TBSP olive oil
2 onions, thinly sliced
1 TBSP minced ginger root
1 TBSP minced garlic
3/4 TBSP ground cumin
2 tsp ground coriander
1 tsp turmeric
1 tsp ground black pepper
1/2 tsp salt
1 14 oz can diced tomatoes in juice (no salt added)
2 10 oz packages of frozen chopped spinach, thawed
1 jalapeno, finely chopped
1 cup chicken stock
juice of 1 lemon

1. Combine chicken with 1/4 cup lemon juice in a large bowl, toss and set aside for 20-30 minutes.
2. Heat oil in a skillet and cook onions over medium-high heat until they begin to colour, about 5 minutes. Reduce heat to medium and cook, stirring, until golden, about 12 minutes.
3. Add ginger, garlic, cumin, coriander, turmeric, pepper and salt and cook stirring for a further minute. Stir in tomatoes with juice and bring to a boil. Remove from heat.
4. Arrange chicken on base of slow cooker stoneware, and pour tomato mixture over the top. Cover and cook on LOW for 6 hours or HIGH for 3 hours, by which time chicken should be fully cooked and falling apart.
5. In a blender or food processor, combine spinach, chili and stock until you get a smooth puree. Add to chicken and stir well. Cover and cook on HIGH for 20 minutes until mixture is bubbling. Just before serving, stir in lemon juice.

Thursday, June 27, 2013

Because it isn't all about the kids!

There is nothing like a living room full of children to make one flee for the kitchen and a spot of blogging. I say "full of children", when in actual fact there is only one non-farrar added to the mix, but the impact of that addition seems to be a twelve-fold increase in energy level and particularly volume. My hearing may never be the same again. Anyway, it has sent me fleeing for my laptop, hence the blog post.

Given my mood, I felt it only right to blog about a not-very-kid-friendly recipe I tried recently. I'm not entirely sure why it was such a non-starter with all three children, particularly since two out of three eat all of the ingredients, and have lapped up other seemingly similar dishes.... Of course, I am forgetting that logic is irrelevant. Nevertheless, I will be adding this to my repertoire, because it can't always be about pleasing those particular three Farrars, particularly since the other two thought this was a great dish. As Annette Bening and Julianne Moore would no doubt point out: the kids are alright.

The recipe comes from a book by George Geary and Judith Finlayson 650 Best Food Processor Recipes, but you can do it easily without a food processor (see instructions below). It is so simple, but so much tastier than a boring old omelette. And it has a way more complicated-sounding French name, so there.


Roasted Leek, Mushroom and Tomato Clafouti
Serves 5

1 lb cherry tomatoes
12 cremini mushroom caps (cut the bigger ones in half)
2 leeks cut into 1/2" slices
2 TBSP olive oil
2 garlic cloves, minced
2 TBSP finely chopped Italian flat-leaf parsley
ground black pepper
4 eggs
1/4 cup AP flour
1 tsp salt
1 cup whole milk
1/4 cup heavy/whipping cream
1/4 cup grated parmesan cheese

1. Preheat oven to 400 degrees F.
2. Butter a 6 cup (1.5L) gratin dish
3. In a large bowl, combine tomatoes, mushrooms and leek with olive oil and toss well. Spread out on a rimmed baking sheet and roast in oven until mushrooms and leeks are lightly browned and tomatoes have collapsed (about 30 minutes). Remove from oven and reduce oven temperature to 350 degrees F. Transfer vegetables to prepared gratin dish and sprinkle with garlic, parsley and pepper to taste.
4. In a food processor with a metal blade, place eggs, flour and salt and pepper to taste. Pulse to blend (about 5 times). Add milk and cream and process until smooth (about 30 seconds). If you don't have have food processor, then I see no reason why you can't just do all of this with a handheld mixer.
5. Pour mixture from processor over vegetables. Bake in preheated oven until edges are set and center is still slightly jiggly (about 30 minutes).
6. Remove from oven and sprinkle with parmesan. Place under a hot broiler until lightly browned. Let cool slightly before serving.

Wednesday, June 26, 2013

More heavenly wholegrains

Yes, I'm a goody-two-shoes, but I really am enjoying the recent Farrar forays into the wonderful world of wholegrains. I've been on a quest to improve our diet in this house, yes, but also to increase the variety. Quite frankly I was getting bored of rice and cous-cous. Today's heavenly wholegrain addition to the Farrar repertoire is bulgur wheat. This is a form of wheat (so those who are gluten intolerant should steer clear) that has been parboiled, cracked and dried. I have had it in the past, but only in Tabbouleh, a delicious Middle Eastern salad (if you are interested, then there is a Barefoot Contessa recipe for Tabbouleh here)

This dish is a great addition to a spot of summer evening barbeque. I found the recipe in Cooking Light, but tweaked it a bit: the supermarket had run out of kalamata olives (except for the disgusting canned kind), so I used green olives; and I added more vinegar to the dressing, as my family like sharp tasting foods. Oh, and I added more feta because.... well just because.

Enjoy :-)


Bulgur Wheat Salad with Feta and Olives
Serves 5

1 cup medium bulgur wheat (denotes the size of the grain - not crucial here, but might affect cooking time)
1 cup shredded carrot
1 cup thinly sliced fennel
1/2 cup olives, halved
1/2 cup shelled, roasted, salted pistachios
5 oz feta cheese, crumbled
3 TBSP red wine vinegar
1/4 cup olive oil
1/2 cup chopped flat-leaf parsley

1. Cook bulgur wheat according to packet directions, drain (if necessary) and cool slightly.
2. Mix bulgur wheat with remaining ingredients and serve at room temperature.

Tuesday, June 25, 2013

My own mission impossible

There are times when I suspect there must have been a mix-up at the hospital when my kids were born, in fact three separate mix-ups. I realize that this seems far-fetched, but consider my grounds for such suspicion: gastronomically speaking, there is compelling evidence that these children cannot genetically be mine. Firstly, my daughter does not like chocolate cake (in fact, this may indicate that she comes from alien stock, as it is simply not human to dislike chocolate cake). No child that emanated from me and my husband can NOT like chocolate anything, let alone chocolate cake. After all, my husband has spent a lifetime making sure to order chocolate fudge cake whenever it appears on a menu. Secondly, my oldest son doesn't like melted cheese on top of things. I know. Ridiculous. Particularly since unmelted cheese is fine, as is melted cheese IN things, such as grilled cheese sandwich. Just not on TOP of things. He is happy to slurp up three or four servings of your delicious pasta bake, but will meticulously scrape all evidence of toasty melted deliciousousness from the top first, with a look of indignant distaste on his face. Sigh.

Perhaps the most anomalous of the Farrar offspring though, is my youngest son, who doesn't like... wait for it.... pasta. WHAT? Firstly, pasta is a blank canvas for all sorts of delectable sauciness, and does not have a taste of its own, well not really. Secondly, this zero-tolerance policy towards pasta seems like a recipe for starvation in a house where pasta is indubitably a staple food and always has been. I have therefore made it my culinary mission to keep trying different pasta recipes. Not, as you might surmise, as a form of sadistic torture for the poor boy, but in the hope that at some point, a huge lightbulb will appear above his head, as he chews on some delicious morsel, and he will, at this moment, realize the error of his pasta-hating ways, break into a huge grin, and of course express extreme gratitude to his long-suffering but perseverant mother.

The latest dish on this culinary mission came from Giada de Laurentiis. From what I can tell from her cooking shows on TV and her books, Giada lives a perfect life. Her kitchen looks spotlessly clean even when she is in the middle of preparing a complex dish, she manages to keep her lipstick flawless whilst eating a bowl of spaghetti AND I have never once witnessed her adorable offspring turn down what she cooks with a whiny cry of "BUT I DON'T LIKE PASTA". I am sure such behavior just wouldn't happen in Giada's house.

I have to confess that the light bulb moment didn't happen this time round. Beloved, but misguided, youngest son, ate everything surrounding the pasta, but managed to leave a sizeable pile of denuded farfalle on his plate. Oh well, the mission continues.... On the plus side though, this is a dish which the remaining four members of the family found delicious, and in my house, even if not in Giada's, four out of five is reason for celebration (and a blog post).


Farfalle with Sausage and Kale
Serves 6

3 TBSP olive oil
1 lb uncooked Italian sausage, casings removed (I used Trader Joe's Italian chicken sausage)
1 medium onion, chopped
2 garlic cloves, minced
1/4 lb cremini mushrooms, sliced
1 28 oz can diced tomatoes with juice
3/4 tsp salt
1/2 tsp ground black pepper
1 bunch kale, largest stems removed, and chopped (about 4 cups)
1/3 cup heavy cream
1 lb farfalle pasta
Grated parmesan to serve

1. Bring a large pot of salted water to the boil.
2. In a large heavy pan, heat olive oil over medium heat. Add sausage and cook until golden, breaking up sausage. Remove from pan with slotted spoon and set aside. Add onion and garlic to same pan and cook over medium heat for 3 minutes. Add mushrooms and continue to cook until mushrooms and onion start to brown (a further 5 minutes or so). Add canned tomatoes with juice and stir to get browned bits off base of pan. Add salt, pepper and sausage back to pan,
3. Meanwhile blanch the kale in the boiling water for 5 minutes and then remove from the water with a skimmer or sieve. Add kale directly to the sausage mixture. Reduce the heat and simmer, covered for 10 minutes. Add cream and stir to combine, then remove pan from the heat.
4. While the sauce is simmering, add farfalle to the water the kale was in. Cook until desired firmness is reached, stirring occasionally. Drain pasta and add to sauce, tossing to combine.
5. Serve with parmesan sprinkled on top.